Minecraft PlayBattleSquare: How to Build an Automatic Farm Step by Step
To build an automatic farm in Minecraft PlayBattleSquare worlds, plant sugar cane on a mud block beside water, add an observer and a piston that cut the cane as it grows, and run hoppers into a chest. The chest fills while you explore, fight, or build.
One fact first: PlayBattleSquare is not an official Minecraft mode, map, or Mojang product. Gaming blogs and community servers use the name for Minecraft guides and PvP-style play. That means no secret PlayBattleSquare mechanics exist, and this guide uses none. It uses standard survival rules, so it works in any survival world on Java Edition or Bedrock Edition.
Every automatic farm has four parts: a crop, a trigger that detects growth, a harvester that breaks the crop, and storage that catches the drops. This guide builds one farm in detail, the sugar cane farm, because it teaches all four parts with common materials. If you remember one tip, make it this: build one column first, test it, then copy it.
What is Minecraft PlayBattleSquare and How Does Automatic Farming Work?
Minecraft PlayBattleSquare is a label, not a game feature. Some sites use it for Minecraft tips and PvP matches on community servers, but Mojang has no mode by that name. For farmers, this changes nothing about blocks, recipes, or redstone rules. Players who search for an automatic farm Minecraft PlayBattleSquare guide usually want the same thing: a build that gathers resources while they do something else.
An automatic farm grows, harvests, and stores resources with little or no help from you. The Minecraft Wiki sorts farms into three types. Manual farms need you to harvest and replant. Semi-automatic farms harvest on their own, but you must start them, for example by pulling a lever. Fully automatic farms need no input at all.
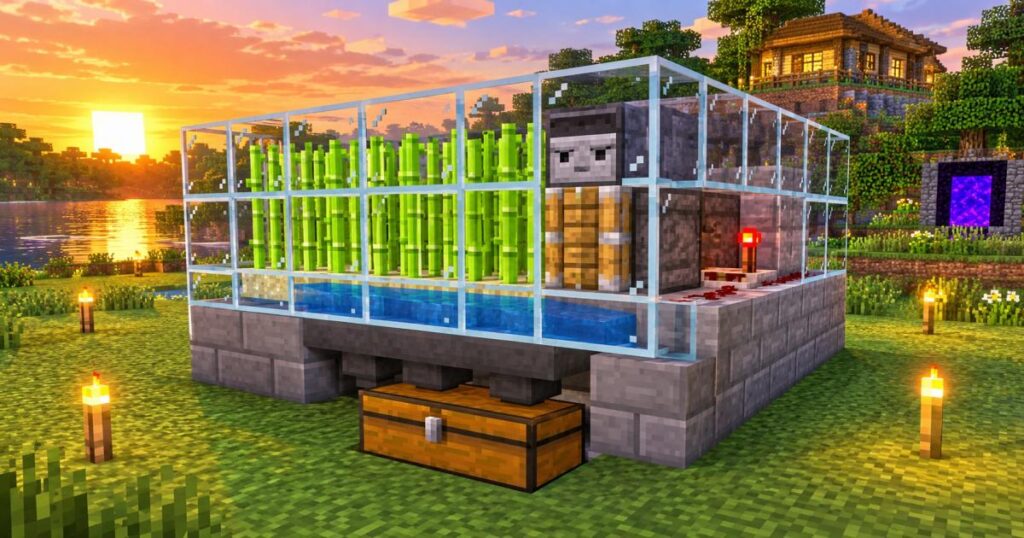
Most Minecraft redstone farms follow one loop. A plant grows. An observer, a block that detects changes, spots the growth and sends a short redstone pulse. The pulse fires a piston, and the piston breaks the crop. Hoppers then carry the drops into a chest, and water keeps the plants alive. Once you see this loop, every Minecraft auto farm gets easier to read.
What You Need Before Building an Automatic Farm
You need a survival world, a supply of iron, and one trip to the Nether. Pistons and hoppers both use iron, and each observer needs one Nether quartz. Redstone comes from mining deep underground.
Pick a flat spot near your base, about 7 blocks wide and 5 deep. Light it with torches, because hostile mobs spawn in the dark and wander into builds. Check your edition too. Java and Bedrock share the layout in this guide, but they differ on details such as bone meal, which comes up later.
Finally, read the rules if you play on a server. Some servers limit redstone, hoppers, or AFK farms. A server linked to the PlayBattleSquare name is still an ordinary Minecraft server, so its admins set the limits.
How to Build an Automatic Farm in Minecraft Step by Step
These steps build a four-column sugar cane farm. Each column works on its own, which makes the design easy to test and easy to expand.
Step 1: Choose Your Farm Type and Prepare the Building Area
Start with sugar cane. It needs no villagers and no farmland, and the payoff comes quickly: three sugar cane make three paper, and paper turns into books, maps, and fireworks. That makes it a practical first Minecraft survival farm.
Clear a flat patch and remove tall grass. Place torches around the edges. Leave room at one end for the chest.
Step 2: Gather the Required Materials
For four columns, collect these items:
- 4 sugar cane
- 7 mud blocks (one under each cane, plus the gaps between columns)
- 4 observers and 4 pistons
- 7 hoppers and 1 chest
- 4 redstone dust
- 2 water buckets
- A stack of cobblestone or any other solid block
Expect to spend roughly 40 iron ingots, 16 redstone dust, and 4 Nether quartz. Hoppers take most of the iron, at 5 ingots each. Each observer uses cobblestone, redstone, and one quartz. Each piston uses planks, cobblestone, iron, and redstone.
Mud works best as the planting block. Its top sits slightly lower than a full block, so a hopper underneath can still pick up cane that lands on it. You can find mud in mangrove swamps, or make it by using a water bottle on dirt. If you have no mud, plant on dirt or sand and collect the cane with a water stream or hopper minecarts instead.
Step 3: Create the Farm Layout
Space your columns two blocks apart, so the redstone dust on neighboring columns never touches. Touching dust links up, and one pulse would then fire every piston at once. That would cut young cane before it grows.
Here is one column, from front to back:
- Sugar cane, planted on a mud block.
- A hopper directly under the mud.
- A water block right behind the mud, at the same height.
- A three-block pillar standing above that water: a support block, then a piston, then an observer.
- A solid block behind the piston, with redstone dust on top.
Mark this footprint with spare blocks before you build. A mistake costs seconds now and minutes later.
Step 4: Set Up Water Channels and Farmland
Sugar cane needs water next to its soil block, not farmland. Dig a trench behind the mud row and fill it with water, so the water sits level with the mud and every mud block touches a source. Two buckets are enough, because you can scoop water back up and place it again.
Crop farms work differently. Wheat, carrots, and potatoes grow on farmland, and farmland stays hydrated when water sits within four blocks. One water source can therefore cover a 9 by 9 patch.
Step 5: Install Hoppers and Storage Chests
Place the hoppers first, one under each future mud block, in a straight line. Point each hopper toward the next, and point the last one into the chest. A hopper faces the block you place it against, so place each one against its neighbor. Sneak while you place the last one against the chest, so the chest does not open.
A single hopper moves 2.5 items per second, far more than four columns produce. A double chest holds 54 stacks, which is 3,456 sugar cane, because cane stacks to 64. Once the hopper line is ready, set the mud blocks on top of it.
Step 6: Build the Redstone Mechanism
This farm needs only one piece of redstone dust per column. An observer sends a short pulse out of its back whenever the block in front of it changes. A growing cane counts as a change, so the plant itself acts as the trigger.
Place the dust on top of the solid block that sits behind the piston, right behind the observer’s back. The dust catches the pulse and powers the block under it. That block touches the piston, so the piston fires.
Step 7: Install Observers, Pistons, and Dispensers
Now build the pillar. Place a support block above the water, put the piston on top of it, and put the observer above the piston. The piston sits level with the cane’s second block, and the observer sits level with its third.
Face both toward the cane. The observer’s face, the side with two small eyes, must look at the cane, and its red output dot must point at the dust. When the cane grows its third block, the observer fires, the piston pushes the second block, and both upper blocks break. The bottom block stays, so the plant regrows.
Build one column, test it, and only then copy it. A wrong direction in one column is a quick fix. The same mistake in four columns takes much longer to find.
Dispensers are optional. Builders mostly use them to fire bone meal at crops. Bone meal speeds up wheat, carrots, and potatoes in both editions. For sugar cane, it works in Bedrock but does nothing in Java, so skip the dispenser in a Java cane farm.
Step 8: Connect and Test the Automatic Harvesting System
Plant the cane on every second mud block. Then check each part in order: the observer faces the cane, the dust sits behind the observer, the piston touches the powered block, and the hoppers lead into the chest.
Now wait. On average, each new cane block takes roughly 15 to 20 minutes to grow, and the farm fires only when the third block appears. Stay within loading range and watch one column through a full cycle. If the piston fires and cane lands in the chest, the farm works.
Step 9: Collect and Store Your Farm Resources
Open the chest after a while and count what arrived. As a rough guide, each column yields about two sugar cane every 35 minutes, so four columns produce around 13 an hour. Empty the chest before it fills, because a full chest stops the hoppers and backs up the line.
Turn the cane into paper, books, and sugar. Some villagers, such as librarians, also buy paper for emeralds.
Best Automatic Farm Types to Build in Minecraft PlayBattleSquare
Sugar cane makes the best first farm, but it is not the only one. This table compares five common builds.
| Farm type | Main output | Difficulty |
| Sugar cane | Paper, books, sugar | Easy |
| Crop farm | Wheat, carrots, potatoes | Medium |
| Chicken and egg farm | Eggs, feathers, chicken | Easy |
| Iron golem farm | Iron ingots | Hard |
| Mob farm | Mob drops and experience | Hard |
Crop farms usually rely on villagers, who plant and harvest the crops. Chicken farms are simple because a chicken lays an egg every five to ten minutes, and a hopper under the pen catches it. Iron golem and mob farms need more redstone and careful spawning rules, so build them after your first cane farm.
How to Make Your Minecraft Automatic Farm More Efficient
Add columns before you add anything fancy. One column makes about two cane per 35 minutes, so each new column raises output by the same amount. Eight columns double the rate of four.
Light the whole farm. Hostile mobs spawn in dark spaces and can wander through the build.
Plan for storage. A double chest holds 3,456 sugar cane, but a farm with mixed output fills faster. Add a second chest or a sorting system, so each item lands in its own chest.
Stay close when you can. The farm grows only while its chunks are loaded, so a base next to the farm works better than one far away. If output ever passes what one hopper line can carry, which is 2.5 items per second, add a second line.
Common Automatic Farm Problems and How to Fix Them
If the cane does not grow, check the water first. Every soil block must touch water at its own level. Then look for a block above the cane, and confirm the chunk is loaded.
If the piston never fires, look at the observer. Most failures start there. The side with the two eyes must face the cane, and the red dot must point at the dust. Then check that the dust sits on top of the block that touches the piston.
If every piston fires at once, your dust lines touch. Leave one empty block between neighboring columns.
If items vanish, trace their path. Dropped items disappear after five minutes, so a blocked or backward hopper costs you cane. Check that each hopper points toward the next and that the chest is not full.
If the build works in one edition but fails in the other, the design is the usual cause. The observer-and-piston cane farm works in both Java and Bedrock, but other redstone builds may not. Bone meal is one example, since it grows cane in Bedrock only. Copy a layout made for your edition.
If you play on a server linked to the PlayBattleSquare name, remember that the rules come from the server, not the label. Ask an admin about farm and hopper limits before you build more than one column.
Automatic Farming Tips for Minecraft Beginners
Build one column first. A single working column teaches you more than four broken ones, and copying it is easy once it works.
Practice in a creative test world. Mistakes cost nothing there, and you can watch the redstone work without mining a single block.
Label your chests with signs. After a few weeks, a sign saves you from opening ten chests to find the cane.
Build close to your base. You will visit the farm often, and a short walk keeps the habit easy.
Skip fancy designs at the start. A simple farm that runs well beats an impressive one that keeps breaking.
Is Building an Automatic Farm Worth It in Minecraft PlayBattleSquare?
Yes, if you need the same item again and again. A four-column cane farm costs about 40 iron ingots, then keeps working for the life of the world.
Advantages of Automatic Farming
An automatic farm saves hours of repeat work. Enchanting is a good example. Maximum-level enchanting uses 15 bookshelves, each bookshelf needs 3 books, and each book needs 3 paper. That adds up to 135 sugar cane. At about 13 cane an hour, four columns cover that in roughly ten hours of loaded time. Sixteen columns cut it to about two and a half.
The farm also frees your time. You can mine, explore, or fight while the chest fills.
Potential Limitations and Challenges
Farms cost iron, redstone, and Nether quartz. Sugar cane grows slowly, so a small farm fills its chest slowly. The farm pauses when you leave loading range, and a server may cap redstone, hoppers, or AFK farming. Very large farms can also slow weaker devices.
Automatic Farming vs. Manual Farming
Manual farming costs nothing and needs no planning, but it takes your time. You walk the field, break each plant, and replant it. Automatic farming costs materials up front, then runs on its own. Players typically automate items they use in bulk, such as cane for books or iron for tools, and farm small amounts by hand.
Final Thoughts
Minecraft PlayBattleSquare may be only a name, but the farm in this guide works in any survival world. Start small. Build one column, watch it fire when the cane reaches its third block, and then copy it.
Add columns over time, since each one adds about two cane per 35 minutes. Check your server’s rules before you build big, pick a design made for your edition, and keep the chunks loaded. Then let the chest fill while you get on with the rest of your world.
FAQs
Can You Build a Fully Automatic Farm in Minecraft Survival?
Yes. You can build a fully automatic farm in survival mode with items you gather yourself: iron, redstone, cobblestone, and one Nether quartz per observer. You need no commands and no creative mode.
Which Materials Are Needed for an Automatic Farm?
A sugar cane farm needs observers, pistons, hoppers, a chest, water, redstone dust, mud or another planting block, and solid building blocks. A four-column build costs about 40 iron ingots and 16 redstone dust. Crop and golem farms add farmland, seeds, or villagers.
Do Automatic Farms Work in Both Java and Bedrock Editions?
The observer-and-piston sugar cane farm works in both editions, but other designs may not. Bone meal also grows sugar cane in Bedrock only, so check that detail before you add a dispenser.
Do Minecraft Automatic Farms Work While You Are Away?
Only while their chunks are loaded. If you travel far from the farm, the game stops growing the cane, and the farm pauses until you return. On a server, the server must stay online and a player must stay close enough to keep the chunks loaded.
How Do You Collect Items Automatically From a Farm?
Use hoppers that lead into a chest. In the cane farm above, a hopper under each mud block catches the cane and passes it along the row to the chest. Water streams and hopper minecarts also work in other layouts.
Why Is My Minecraft Automatic Farm Not Working?
Check four things, in this order: water beside every soil block, the observer’s face pointing at the cane, the redstone dust behind the observer, and loaded chunks. One of these causes most failures.
Which Automatic Farm Produces the Most Resources?
It depends on the resource. Plant farms such as sugar cane give the most items for the lowest cost, iron golem farms give a steady iron supply, and mob farms give drops and experience.